
Ryobi Line Trimmer Manual: A Comprehensive Guide
Ryobi offers extensive power tools and solutions, including reliable line trimmers. This manual provides detailed guidance for Ryobi users, covering operation, maintenance, and troubleshooting;

Ryobi line trimmers are popular choices for homeowners seeking efficient and affordable lawn and garden maintenance. Known for their versatility and compatibility within the Ryobi One+ system, these trimmers offer a convenient power solution. Users appreciate their ability to handle edging along concrete and general trimming tasks effectively. The brand’s extensive tool ecosystem allows for shared batteries and chargers, reducing costs. Ryobi consistently receives recommendations for home users due to its balance of price and performance, offering a wide range of models to suit various needs.

Understanding Ryobi One+ Compatibility
The Ryobi One+ system is a cornerstone of the brand’s appeal, allowing users to utilize the same battery across over 200 different tools. This includes 18V and 36V options, with the 36V tools often utilizing two 18V batteries for increased power. Users are increasingly opting for generic lithium-ion batteries compatible with the Ryobi One+ platform to save money, bypassing the premium cost of official Ryobi batteries. This interoperability extends to various tools like framing guns and transfer pumps, maximizing value and convenience for the user.
Safety Precautions & Warnings
Ryobi line trimmers, while user-friendly, require strict adherence to safety guidelines. Always wear appropriate eye and face protection, along with sturdy footwear and long pants, during operation. Be mindful of bystanders and pets, maintaining a safe operating distance. Inspect the trimmer for damage before each use, and never modify the tool. Disconnect the battery before making any adjustments or changing the line. Avoid wet conditions and ensure proper ventilation when charging batteries. Prioritize safety to prevent injury.
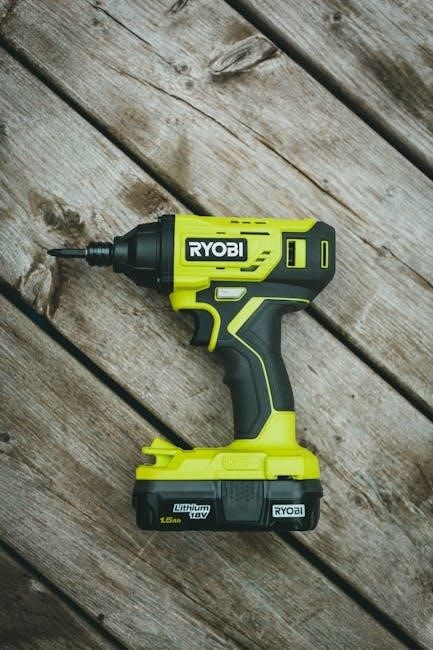
Parts Identification
Ryobi line trimmers consist of several key components. These include the motor housing, the cutting head (containing the line spool), the shaft, the handle, and the battery compartment. The trigger initiates operation, while the line feed mechanism controls line advancement. A gear case protects internal gears. Familiarize yourself with these parts for proper assembly, maintenance, and troubleshooting. Understanding each component’s function is crucial for safe and effective operation. Refer to diagrams in this manual for visual identification of each part.

Spool and Line Replacement
Ryobi line trimmer spool replacement is straightforward. First, disconnect the battery. Access the spool compartment, typically by pressing release tabs. Remove the empty spool and clean the compartment. Install a new spool, ensuring the line feeds correctly through the eyelets. Secure the spool cover, confirming it clicks into place. Replace the line annually, or as needed, depending on usage. Using the correct line diameter is vital for optimal performance. Always refer to your model’s specific instructions for detailed guidance.
Motor and Head Assembly
Ryobi line trimmer motor and head assembly are robustly designed for durability. The motor powers the cutting head, which houses the spool and line feed mechanism. Regular inspection of the head for damage is crucial. Ensure all screws are tightened securely. The head often features a rotating capability for edging. If the motor exhibits unusual noises or reduced power, discontinue use and inspect for obstructions. Proper alignment of the head to the shaft is essential for smooth operation and longevity of the tool.
Assembly Instructions
Ryobi line trimmer assembly is straightforward, designed for user convenience. Begin by carefully unpacking all components and verifying against the parts list. Attach the handle securely to the shaft, ensuring a firm grip. Next, connect the cutting head, aligning it properly with the motor housing. Tighten all bolts and fasteners, but avoid over-tightening. Before operation, double-check all connections for stability. Refer to the included diagrams for visual guidance. Proper assembly is vital for safe and efficient trimming performance.
Attaching the Cutting Head

Ryobi’s cutting head attachment requires careful attention. First, ensure the motor housing is clean and free of debris. Align the cutting head with the designated mounting point, often indicated by arrows or markings. Push the head firmly into place until it clicks or locks securely. Some models may require tightening a locking knob or screw. Verify the head rotates freely before proceeding. Incorrect attachment can lead to operational issues or safety hazards. Always consult the diagram in your manual for specific model instructions.
Handle and Shaft Connection
Ryobi line trimmer handle and shaft connection is crucial for comfortable and controlled operation. Typically, the handle slides onto the shaft and secures with a locking mechanism – often a knob or lever. Ensure the handle is firmly tightened to prevent slippage during use. Adjust the handle position for optimal ergonomics, considering user height and preferred trimming stance. Some models feature adjustable handles for enhanced customization. A secure connection minimizes vibration and maximizes control, contributing to a safer and more efficient trimming experience.
Operating Instructions
Ryobi line trimmer operation requires adherence to safety guidelines. Before starting, ensure the area is clear of obstructions and people. Properly install the battery, verifying a secure connection. To initiate trimming, engage the trigger and maintain a firm grip on the handle. Utilize appropriate trimming techniques for edging versus general trimming, adjusting the trimmer head accordingly. Avoid overreaching and maintain a stable stance. Regularly check the line length and replenish as needed for optimal cutting performance. Always disengage the trigger and remove the battery when not in use.
Starting the Trimmer

Ryobi line trimmer startup is straightforward, but crucial for safe operation. First, confirm the battery is fully charged and securely inserted into the tool. Ensure the trimmer head is clear of any obstructions. Depress the safety lock-out button, then firmly squeeze the trigger to initiate the motor. If the trimmer fails to start, check the battery connection and ensure the line isn’t jammed. Release the trigger immediately if unusual noises occur. Never attempt to start the trimmer with a damaged head or guard.
Trimming Techniques (Edging vs. General Trimming)
Ryobi line trimmers excel at both edging and general trimming, but techniques differ. For edging, tilt the trimmer head and use the line to create a clean vertical cut along sidewalks and driveways. Maintain a consistent angle and avoid digging into the surface. For general trimming, use a sweeping motion, moving from left to right. Avoid contact with hard surfaces to prolong line life. Overlap passes slightly for a uniform finish. Remember safety glasses are essential during both edging and general trimming operations.
Line Feed System Troubleshooting
Ryobi line trimmer line feed issues are common. If the line doesn’t advance, ensure the spool is installed correctly and the line isn’t tangled. Check for debris blocking the line exit. For automatic feed systems, firmly tap the spool against the ground while trimming. If problems persist, manually feed the line by pressing the line release button while gently pulling on the line. Regularly inspect the spool for wear and replace it annually for optimal performance. Avoid overfilling the spool to prevent jamming.

Automatic Feed Issues
Ryobi’s automatic line feed can sometimes malfunction. If the line isn’t advancing, try a firm tap of the trimmer head against a hard surface while operating. Ensure the spool isn’t empty or overfilled, as both can cause issues. Check for obstructions in the line exit path. A common problem is old or brittle line sticking within the spool housing. Regularly cleaning the spool area and using fresh line can resolve many automatic feed failures; Inspect the spring mechanism for damage.
Manual Line Feed Operation

Some Ryobi line trimmer models feature a manual line feed option. Typically, this involves pressing a button or lever on the trimmer head while gently pulling on the line ends. This action manually advances the line from the spool. If the automatic feed fails, the manual feed provides a reliable alternative. Ensure you’re using the correct technique as described in your specific model’s instructions. Avoid excessive force, which could damage the feed mechanism. Regularly check the line length and replenish as needed for optimal trimming performance.
Battery and Charger Information
Ryobi line trimmers utilize various battery platforms, primarily 18V and 36V Lithium-Ion. Compatibility within the Ryobi One+ system is a key benefit, allowing batteries to power multiple tools. Charging times vary depending on the battery amp-hour (Ah) rating and charger type. Always use a Ryobi-approved charger to prevent damage and ensure safety. Indicators on the charger display charging status. Consider purchasing higher Ah batteries for extended runtime. Generic batteries are available, but quality can vary, potentially impacting performance and warranty.
Ryobi Battery Types (18V, 36V, Lithium-Ion)
Ryobi predominantly employs Lithium-Ion batteries in their line trimmers, available in 18V and 36V configurations. 18V batteries are versatile for lighter tasks, while 36V (often two 18V batteries combined) provides increased power for demanding jobs. Lithium-Ion technology offers benefits like consistent power output, reduced self-discharge, and lighter weight compared to older battery types. Amp-hour (Ah) ratings indicate runtime; higher Ah means longer operation. Choosing the right battery depends on the trimmer model and intended use.
Charging Procedures and Indicators
Ryobi chargers utilize a straightforward process. Connect the battery securely to the charger, ensuring proper alignment. The charger’s LED indicator will illuminate, typically displaying red for charging and green for fully charged. Avoid charging batteries in extreme temperatures. A complete charge cycle can take several hours, varying based on battery capacity and charger type. Never overcharge batteries. Regularly inspect the charger and cord for damage. Using only Ryobi-approved chargers ensures optimal performance and battery longevity.
Maintenance and Care
Ryobi line trimmer longevity depends on consistent maintenance. Regularly clean the trimmer housing, removing grass and debris after each use. Inspect the spool for wear and replace the line as needed. Periodically check the motor and head assembly for damage. Lubricate the gear case to ensure smooth operation – refer to the manual for specific lubricant recommendations. Store the trimmer in a dry, sheltered location. Proper battery care, including cleaning terminals, is also crucial for optimal performance and extended tool life.
Cleaning the Trimmer
Ryobi recommends cleaning your line trimmer after every use to prevent debris buildup. Disconnect the battery before cleaning! Use a soft brush or cloth to remove grass clippings and dirt from the trimmer head, shaft, and motor housing. Avoid using water directly on the motor or battery compartment. Inspect the air vents and clear any obstructions. A clean trimmer operates more efficiently and extends the life of its components. Regularly wiping down the exterior also prevents corrosion and maintains a professional appearance.
Gear Case Lubrication
Ryobi line trimmers require periodic gear case lubrication for optimal performance and longevity. Check your model’s manual for specific lubricant recommendations – typically a lithium-based grease is suitable. After disconnecting the battery, access the gear case (refer to your parts diagram). Apply a small amount of grease to the gears, ensuring complete coverage. Avoid over-lubrication, as excess grease can attract dirt. Regular lubrication reduces friction, minimizes wear, and ensures smooth operation of the cutting head. Inspect and re-lubricate as needed, especially after heavy use.
Troubleshooting Common Problems
Ryobi line trimmer issues are often easily resolved. If the trimmer won’t start, ensure the battery is fully charged and properly inserted. Check the safety lock-out and trigger. Frequent line breakage suggests using the correct line diameter or inspecting the spool for proper winding. For feed issues, clean the auto-feed mechanism. If propulsion fails on 36V self-propelled models, examine both blade and drive motors. Always disconnect the battery before any inspection or repair. Refer to the manual for detailed diagrams and safety precautions.
Trimmer Won’t Start
If your Ryobi line trimmer fails to start, first verify the battery has sufficient charge and is securely connected. Confirm the safety lock-out button is engaged and the trigger is fully depressed simultaneously. Inspect the battery terminals for corrosion and clean if necessary. A faulty battery or charger could be the cause; test with a known working setup. Ensure no debris obstructs the motor or trigger mechanism. If issues persist, consult the full manual for detailed troubleshooting steps and diagrams, prioritizing safety.
Line Breaks Frequently
Frequent line breakage with your Ryobi trimmer often indicates incorrect line diameter – ensure you’re using the recommended size specified in the manual. Check for damage to the spool or cutting head; cracks or rough edges can cause snapping; Aggressive trimming against hard surfaces like concrete accelerates wear. Consider reducing trimming speed or altering your technique. Regularly replacing the line cartridge annually, as some users suggest, can also prevent this. Inspect the line feed system for obstructions hindering smooth release.
Ryobi Warranty Information

Ryobi tools are backed by a warranty, typically covering defects in materials and workmanship. The standard warranty period varies by region and product type, so consult your purchase receipt or the official Ryobi website for specifics. Warranty coverage generally excludes normal wear and tear, misuse, or unauthorized repairs. Registering your tool online often extends the warranty duration. Keep proof of purchase for all warranty claims. Contact Ryobi customer support for claim procedures and authorized service locations.
Ryobi Tool Ecosystem & Accessories
Ryobi’s strength lies in its One+ system, allowing batteries to power over 230 tools! This includes a wide range of accessories compatible with your line trimmer, such as extra spools of line, edging wheels, and even brush cutter attachments. Expanding your Ryobi collection offers cost savings, as you only need to purchase compatible batteries and chargers. Explore options like self-propelled mowers and framing guns, all powered by the same Ryobi battery platform, maximizing versatility and value.
Comparing Ryobi to Other Brands (Ozito, Makita, Einhell)
Ryobi often stands out for home users due to its cost-effectiveness and extensive range. While brands like Makita offer professional-grade durability, they come at a higher price point. Ozito provides a budget-friendly alternative, sometimes requiring converters for Ryobi batteries. Einhell also competes in the affordable market. User feedback suggests Ryobi balances price and performance well, particularly with its One+ system. Consider your needs – for occasional home use, Ryobi is a strong contender, offering good value.
Ryobi 36V Self-Propelled Mower & System Integration
Ryobi’s 36V system demonstrates impressive integration, as seen with their self-propelled mowers. These mowers often utilize two 18V batteries to achieve 36V power, sometimes with a booster battery for demanding tasks. This compatibility extends to other Ryobi tools, allowing battery sharing across your garden equipment. Users report reliable performance over years of use, though occasional motor issues may arise. The system’s flexibility and cost-effectiveness make it appealing for comprehensive lawn and garden care.